Get a Drop Box Email Address
First of all, you need to create a folder and check the checkbox "This is a Drop Box folder". If you have already created a
Drop Box Folder, you can simply log on to DriveHQ.com website, then from the DriveHQ Start Menu, click "Dropbox", you will
see a list of Drop Box folders in your account.
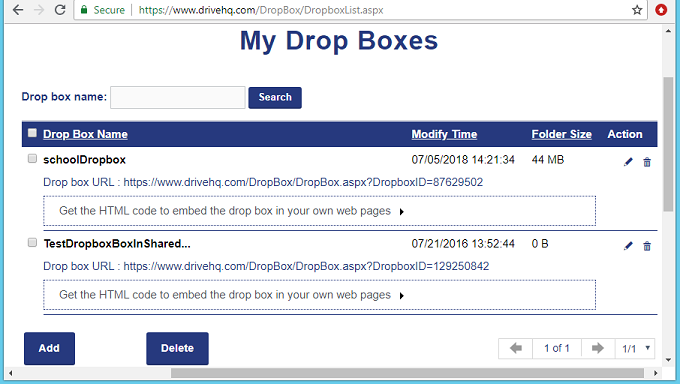
the "Manage Drop Box Folders / My Drop Box Folder List" page
Click a Drop Box name, you will see the Edit Drop Box page as shown below. The Drop Box email address can be found in
this page.

the "Manage Drop Box Folders / My Drop Box Folder List" page
To receive files into this folder, you just need to ask other users to send emails to the Drop Box email address.
There are two versions of Drop Box email addresses:
(1): dbx*********@*******.com (As shown in the screenshot below).
If a person sends an email with attachments to this email address, the system will automatically create a subfolder in
the drop box folder. The subfolder name is the sender's email address.
The files attached in the email are automatically saved to the subfolder. This way, if multiple
people send emails to the drop box, the attached files will be saved to different subfolders.
This method can also prevent file overwriting if multiple people email files with the same names.
(2): dbxd*********@*******.com (Note: just replace "dbx" with "dbxd"). If you use this email address,
the system will not create subfolders. Attached files will be directly saved to the drop box folder. So please make sure
the attached files use different names. Otherwise, file overwriting may occur.
The Email Drop Box feature can work with many scanners (e.g. Ricoh printers). You can configure your scanner/printer to
automatically email the scanned documents to a drop box email address, then the files will be saved to
your DriveHQ cloud folder and you can access the cloud files using Windows File Explorer (with the WebDAV Drive Mapping Tool).